Drone Software Decoded

Request a quote for

Need a Proposal or Have a Question? Please fill out the form below
and one of our aerial experts will be in touch immediately.

We would never share your information with third parties. Privacy Policy

The DJI Mavic Pro is extremely popular mostly due to it’s extremely compact, foldable design. DJI sweetened the deal with the Mavic by giving it some great intelligent flight modes. These features offer new levels of creativity and functionality by either supplementing user flights or letting the aircraft fly all on its own. The flight modes include Active Track (aka Trace), Gesture Mode, Tapfly, Tripod, and Cinematic modes. These flight modes and more work on the DJI Mavic 2. We’re here to show you how to get to the flight modes and make them work and see how well they function.


Intelligent Flight Modes:

After getting your Mavic Pro ready to fly (fully charged battery, propellers attached, everything turned on), open the DJI Go 4 app.

On the center left side of the application, there are three buttons: Auto-Land (circle with arrow pointing down), Return To Home (circle with arrow and an H), and a button that looks like a remote controller. To access intelligent flight modes, tap on the remote controller icon.

Once you’ve tapped the RC icon on the left, a screen will pop up with all of your intelligent flight modes.

Just tap on the icon for whichever Flight Mode you would like to use. If it is your first time using that flight mode (or if you purposely chose not to click “never show again”) the application will give you a brief explanation of what it does, and how to use it.

GESTURE mode

Gesture mode is great for taking remote controller-free selfies.

Once you put your arms up to confirm, the controller will say that it is turned to Active Track mode. This threw us off at first, but never fear, gesture mode is just making sure it’s following you if you move. Gesture as if you’re opening a square (or oval works too, we haven’t tried heart shape yet) and the lights under the arms will start to flash. Once the lights start flashing you will have 3 seconds to strike a pose, then Mavic will snap your picture.

ACTIVE TRACK mode

Active Track is similar to Gesture Mode in that it will follow its subject’s movement but unlike Gesture will not respond to commands outside of the app or remote controller. Active Track is best suited for video of any moving subject or taking still pictures of a moving subject other than yourself. To start tracking your subject, click on them in the application and a box will appear around them when the Mavic locks on. When the Mavic is locked on, a button to the right of the box will appear that says “OK”. Tap that and Mavic will start following the subject wherever it goes, keeping the subject center frame.

Recording video or snapping stills must be started and stopped (or snapped) from either the app or the remote controller.

 TAPFLY

Tapfly is fairly simple: turn on Tapfly mode and pick a place on the screen to fly to. It will keep that spot center frame, and ascend or descend based on where on the screen was tapped. You can adjust the speed with a slider bar just like the one above. Keeping it slow will get you a cinematic pulling-in shot without any of the guesswork of manual flying. Tapfly works fairly well, but it may take a couple tries to get it down if you haven’t used it before.

GamesVideoReview

TRIPOD mode

Tripod mode is perfect for getting smooth, cinematic shots. Even jamming the sticks to their full range, the movement of the aircraft is still slow and smooth. This is probably our favorite intelligent flight mode just because it makes any landscape shot very easy to capture.

CINEMATIC mode

Cinematic mode is a little less useful than most of the other Intelligent flight modes, but there are situations in which it can be useful. A slow pan into a fast moving shot would be one of those situations, as it slows yaw speed and braking speed. This will prevent the end of your shot from having a hard stop to it, but that’s about the extent of the usefulness.

WIFI CONTROL

To control your Mavic from your mobile device instead of using the remote controller, you first have to switch from RC to Wifi mode. The switch is directly above your SD card slot.

This must be done while the aircraft is powered off to register the change. Once you power it back on, find the wifi address on your mobile device that matches the SSID on the right front arm of your Mavic (the password is there as well). Enter your password, open the DJI Go 4 app, and get ready to fly.

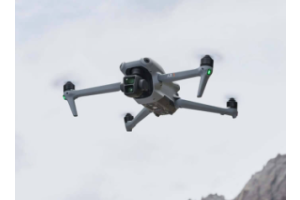
In wifi mode, you can only do an automatic takeoff which works well, but I sat on my phone for about a minute trying to pull the sticks in towards the middle. Just trying to avoid having you do that as well.

As far as the usability, I personally am not a huge fan. It’s great if you don’t want to take your remote controller with you, and for capturing quick simple shots. The intelligent flight modes still work, so if you want to put it into Active Track or Gesture mode quickly it will work great. The controls for manual flight are a little laggy, and don’t feel nearly as precise as using the remote controller, so I wouldn’t use it for extended or complicated flights.

Also, those joysticks won’t show up on the screen unless you’re touching the screen.

LANDING

This isn’t quite an intelligent flight mode, but it’s worth mentioning. When you initiate an automatic landing in the application, Mavic will make sure the landing area is clear of debris and is safe to land before it takes the aircraft down and shuts the motors down.